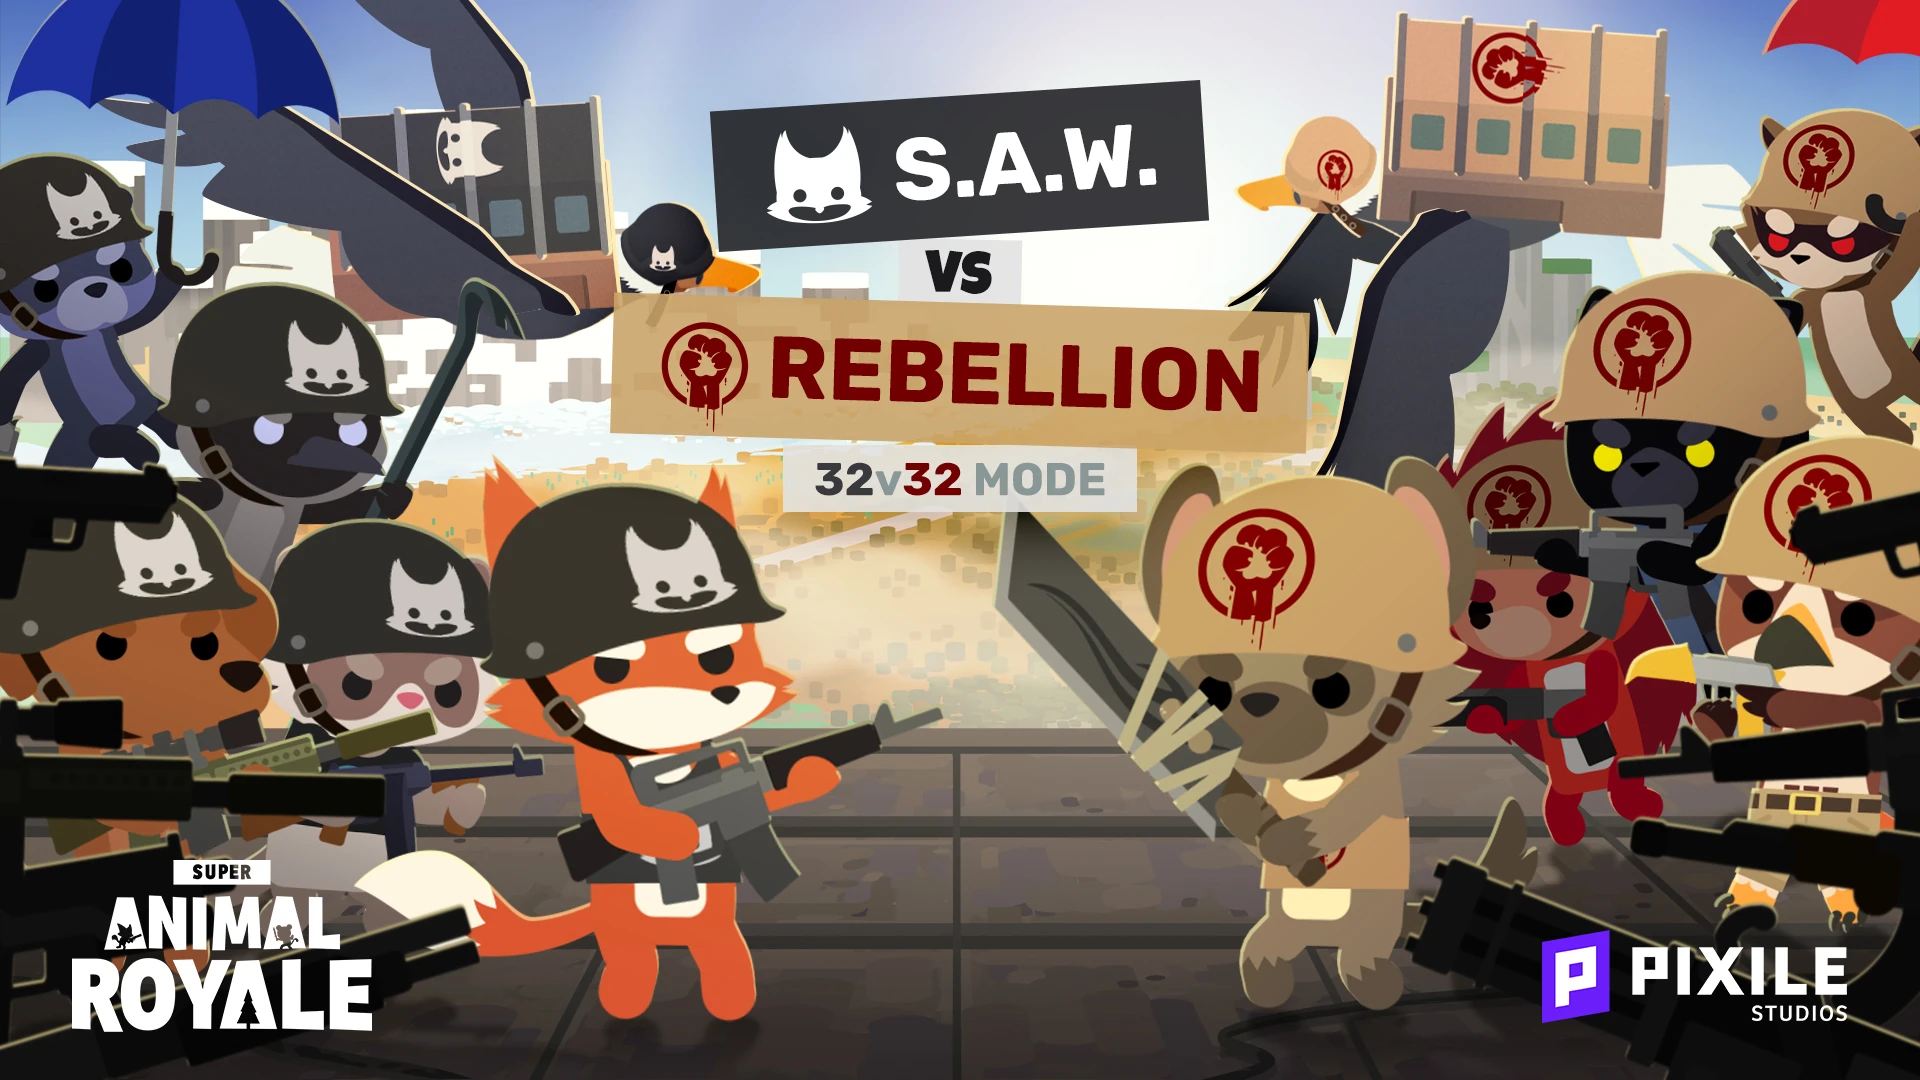
Promotional artwork for S.A.W. vs Rebellion.


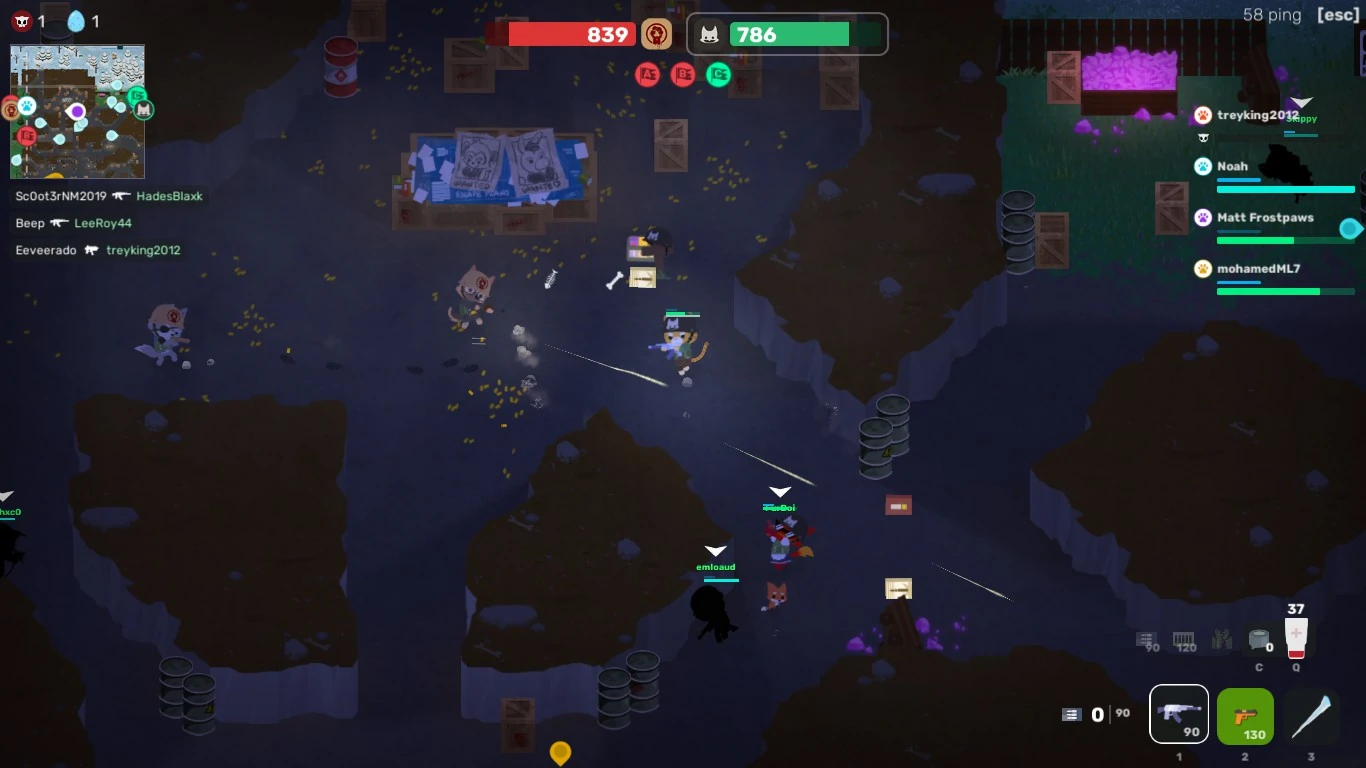
Battle between S.A.W. and Rebellion forces.
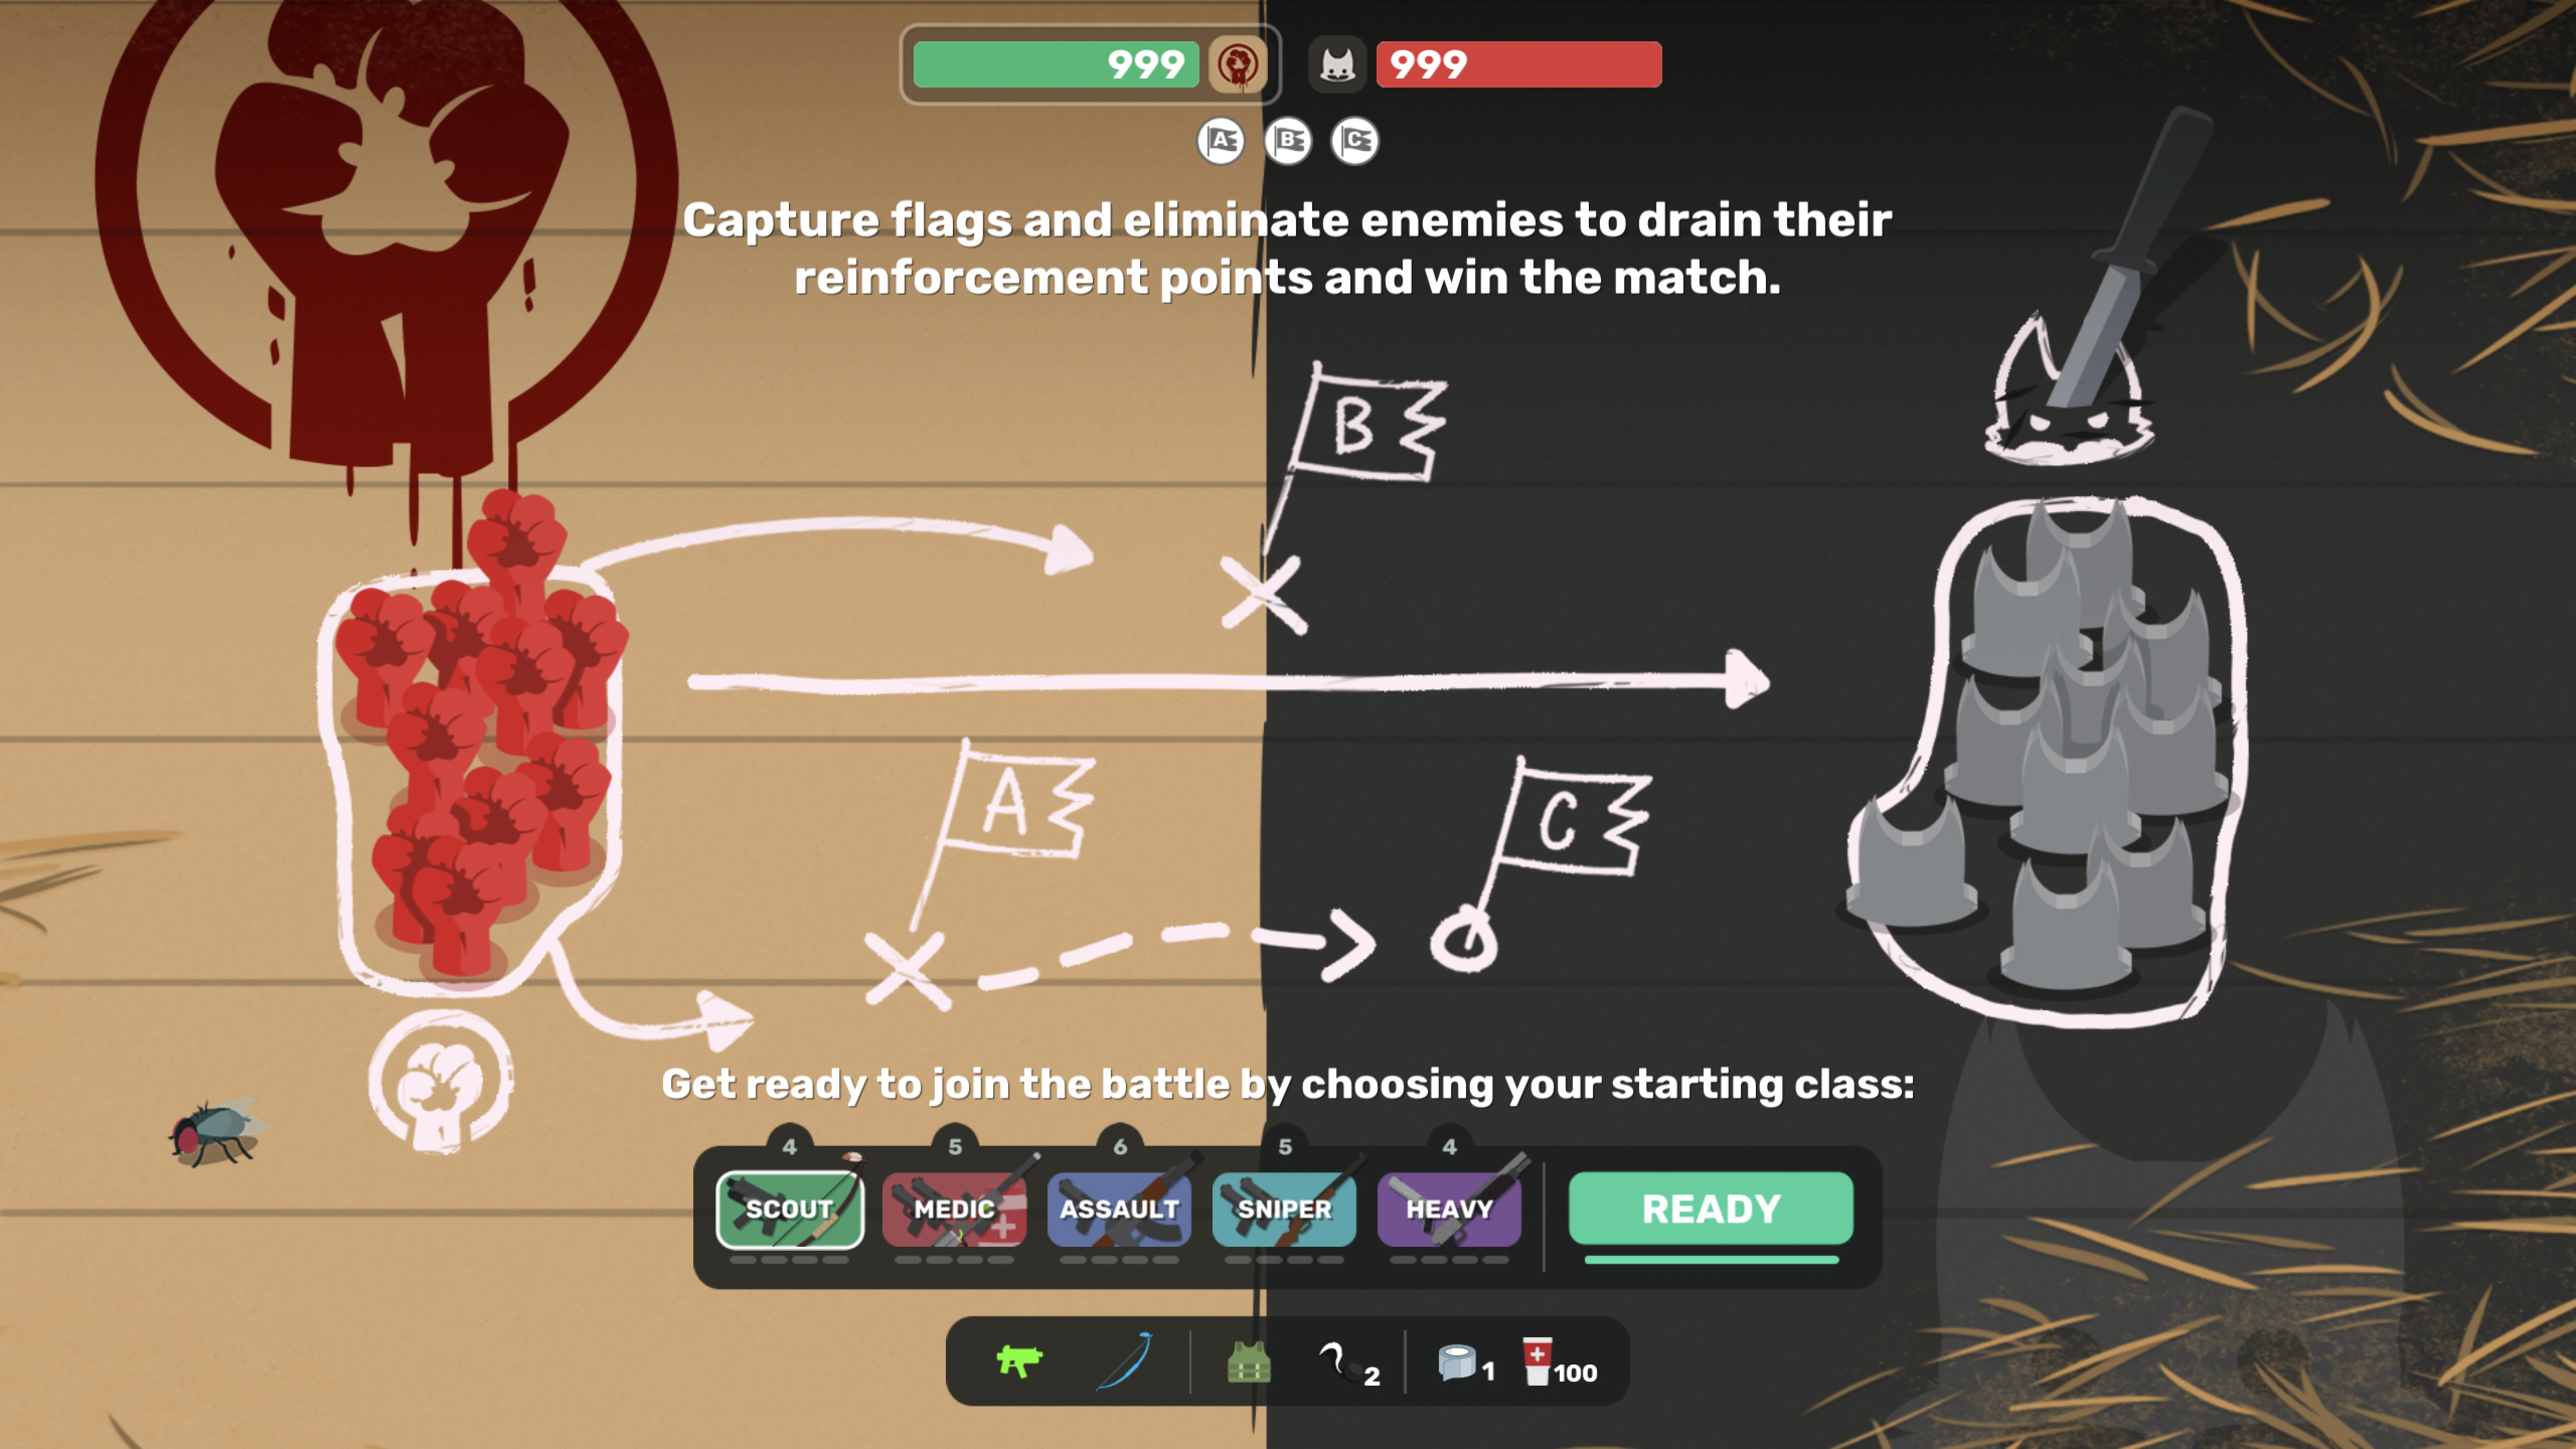
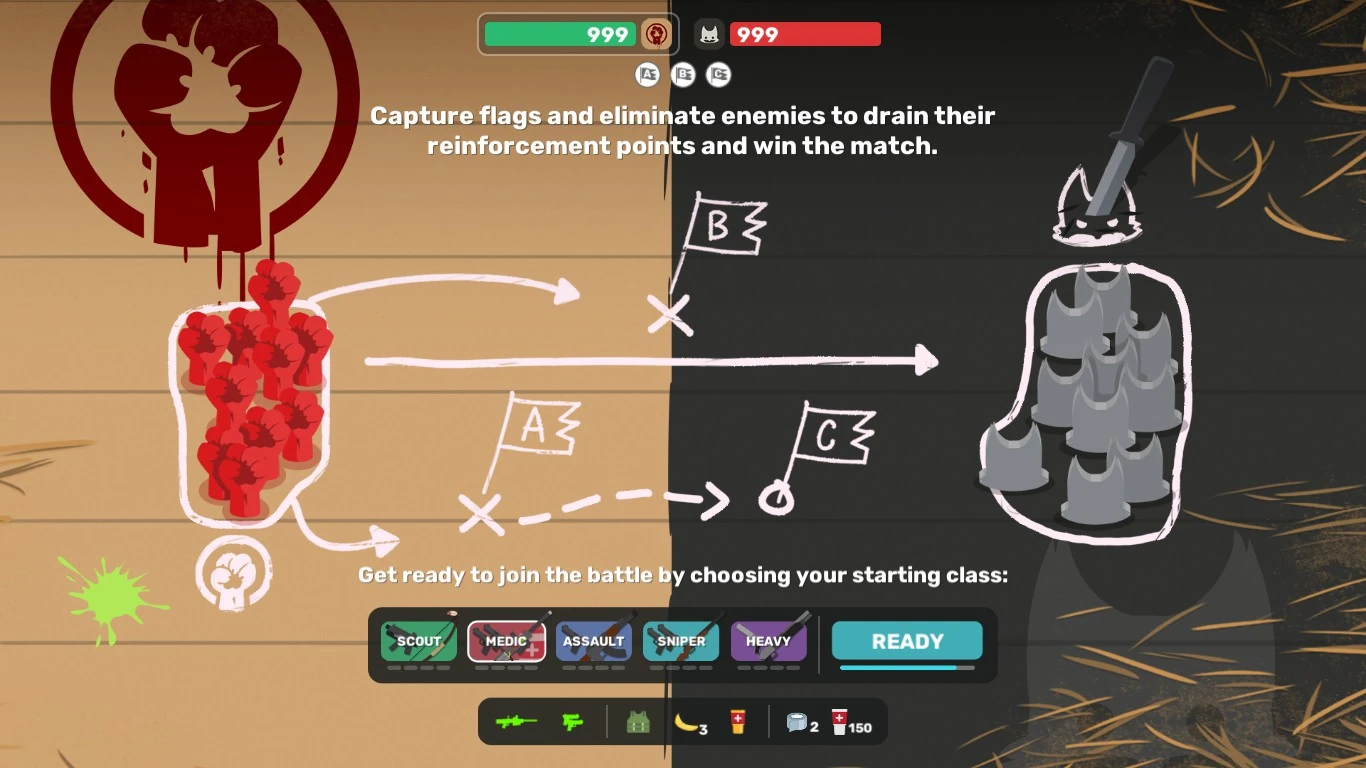
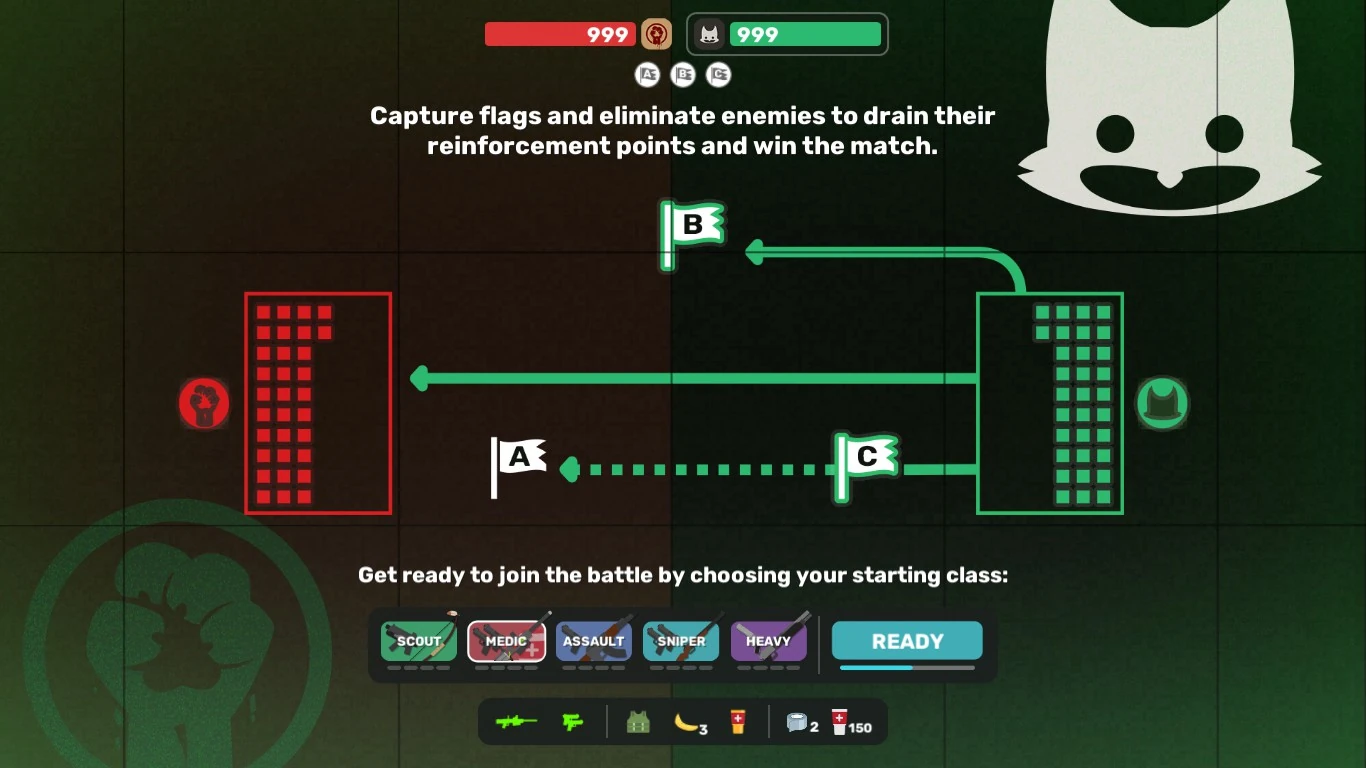
S.A.W. vs Rebellion is a limited-time game mode in which the S.A.W. Security Forces fight against the Super Animal Super Resistance in a series of locations around Super Animal World. It is a Control Point-style game mode between two teams of 24 Super Animals each, featuring a selection of specialized classes and maps to play on. The goal of each team is to cause the enemy team to run out of points by a variety of means including capturing flags, killing enemies, or capturing the reward crate of the Giant Star-nosed Mole. After being killed, Super Animals may respawn at their team's spawn point. [1][2]
The mode was first introduced publicly in the Public Test Realm (PTR)[3], and was initially a team elimination mode with a flag control game mechanic, spanning the entirety of Super Animal World.
General[ | ]
![]() Hamster Balls will spawn near a team's spawn point. When these Hamster Balls are broken, they will respawn after a short while.
Hamster Balls will spawn near a team's spawn point. When these Hamster Balls are broken, they will respawn after a short while. ![]() Giant Emus will spawn around the map. If they are killed, they will respawn at their original position if no players are nearby. Hamster Balls and Giant Emus respawn every 20 seconds.
Giant Emus will spawn around the map. If they are killed, they will respawn at their original position if no players are nearby. Hamster Balls and Giant Emus respawn every 20 seconds.
In this mode, players are unable to drag and drop any items from the inventory. Instead, Super Animals will drop a random set of pickups upon death, such as ![]() Health Juice,
Health Juice,  Super Tape, and
 ![]() Ammunition. Pickups can still be obtained by breaking
Ammunition. Pickups can still be obtained by breaking ![]() Crates,
Crates, ![]() Egyptian Pots, and cutting
Egyptian Pots, and cutting ![]() Tall Grass. Pickups despawn after 30 seconds.
Tall Grass. Pickups despawn after 30 seconds.
In this mode, the "Need Help!", "Danger!" and "Go go" pings can be seen and heard by all players in the same team. In addition, players can also ping the flags to notify their teammates to capture or defend it. Pinging a flag is also audible and visible to the entire team.[4]
While kills in this game mode count towards challenge goals, they do not count towards milestone progression.
There is minor matchmaking in the distribution of teams. Players and squads are assigned scores based on their Level and the game tries to make both teams have an equal score to provide a more balanced experience.[5]
Classes[ | ]

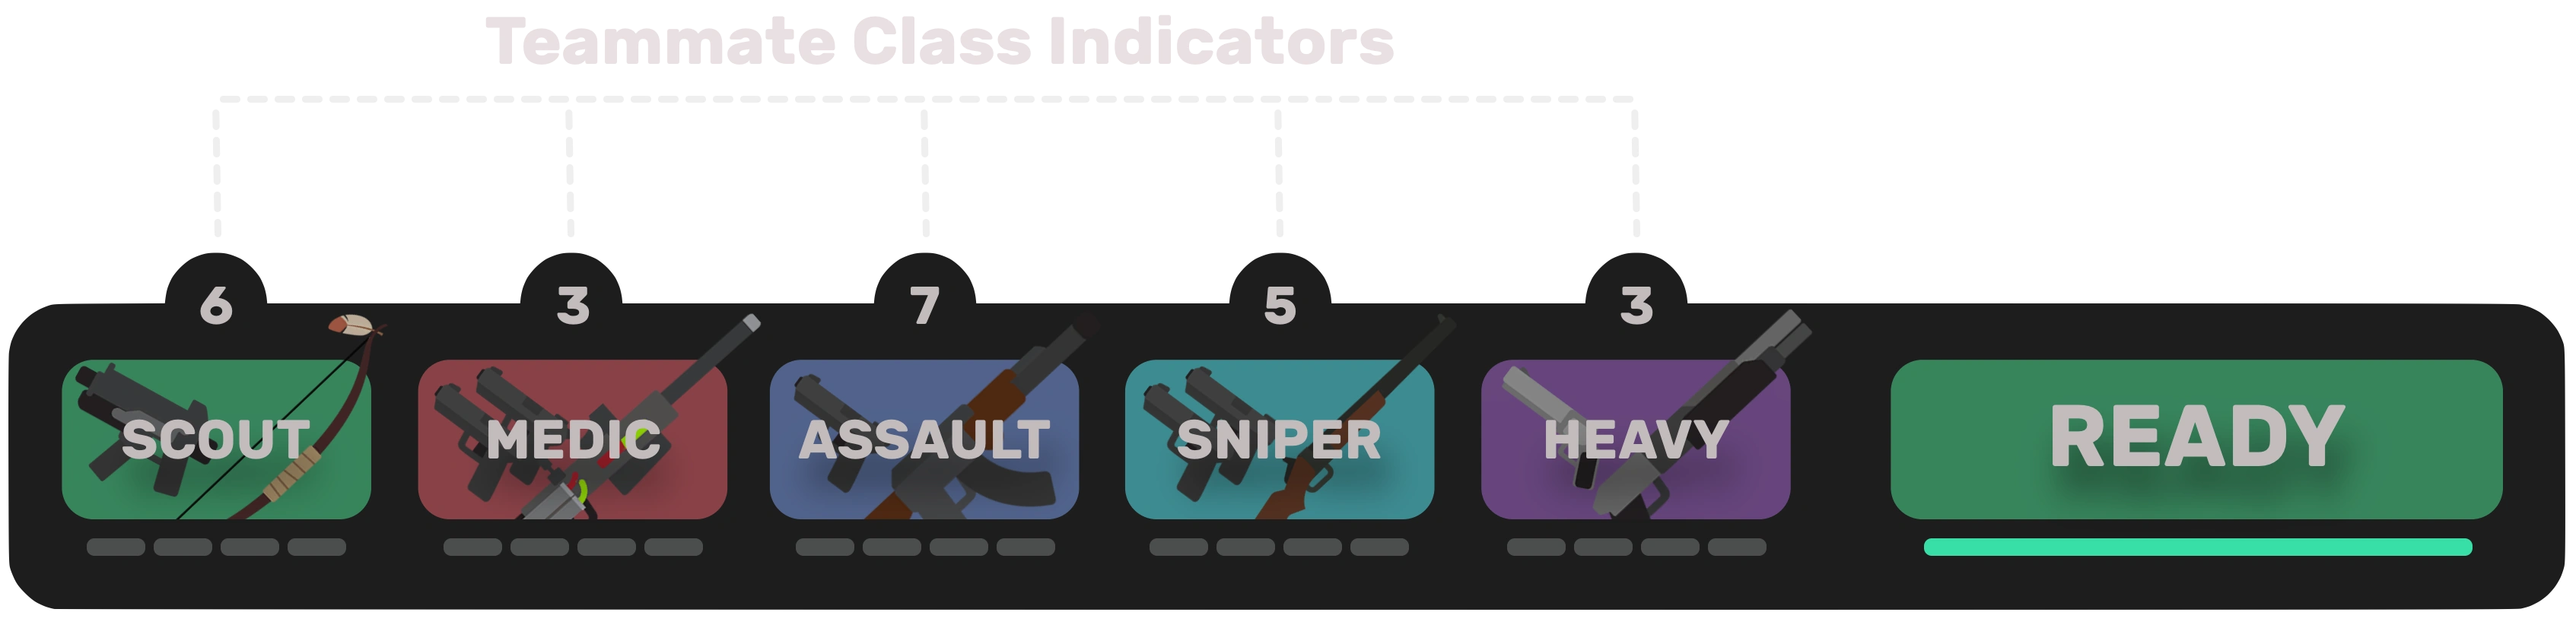

Team Class Selection Menu
There are 5 classes to choose from in this mode. Players may pick a class before the match begins, and can switch to another class after they die. Players are locked to the respective weapons of their class, and are unable to swap or loot weapons. Players will only pick up ammo that their class can use.
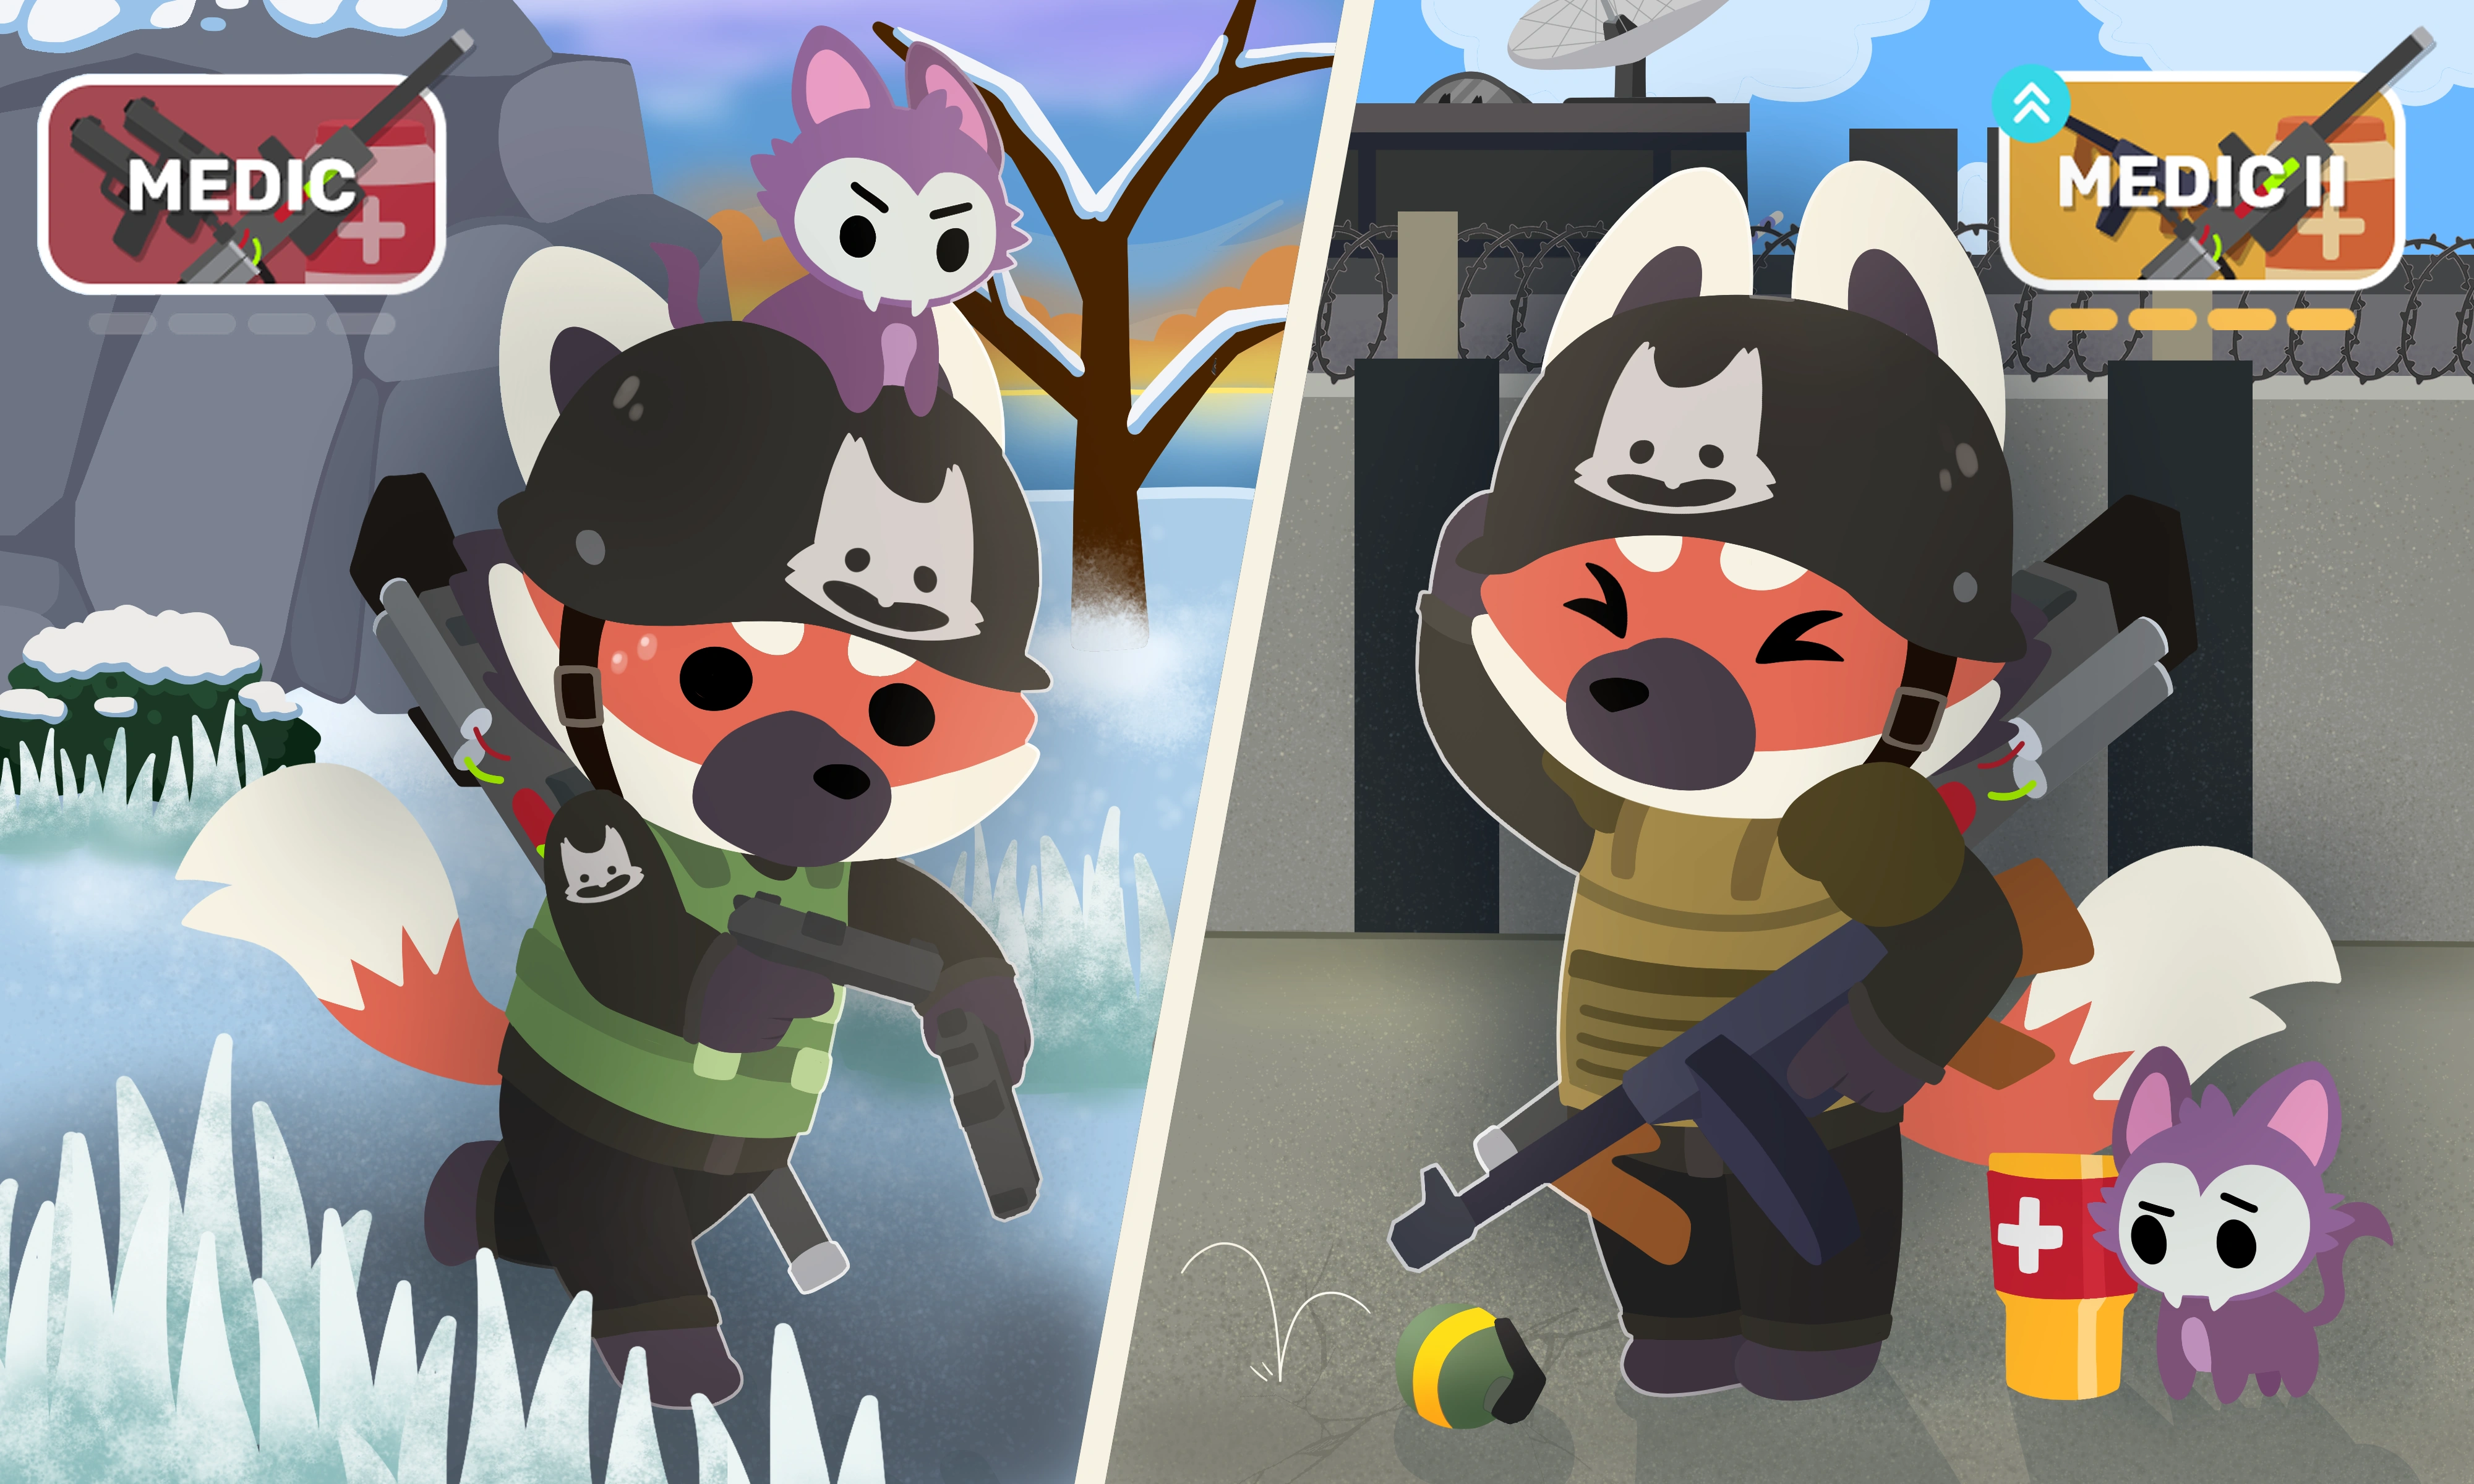
Players may unlock the Tier 2 loadout of their class by earning 4 kills, or in the case of the Medic, by healing allies with the ![]() Dogna's Dart Gun, where 75 health points healed counts as one tick towards the upgrade. Once the requirements have been met, the Tier 2 version will be available in the class selector before respawning. After the Tier 2 loadout has been chosen, it will revert to the Tier 1 version after the next death, and will need to be unlocked in order to be used again.
Dogna's Dart Gun, where 75 health points healed counts as one tick towards the upgrade. Once the requirements have been met, the Tier 2 version will be available in the class selector before respawning. After the Tier 2 loadout has been chosen, it will revert to the Tier 1 version after the next death, and will need to be unlocked in order to be used again.
Classes are picked in the Class Selection Screen, where players can choose from the 5 different classes. Above every class selection is a count of the players in the player's team who currently have that class selected. This helps give players a better scope when choosing a class to help their team better balance themselves in the field.
| Name | Weapons | Armor | Items | Consumables |
|---|---|---|---|---|
| Scout |   |
 |
1
| |
| Scout II |   |
 |
|
4
|
| Medic |   |
|
|
3
|
| Medic II |  |
 |
|
5
|
| Assault |   |
|
1
| |
| Assault II |  |
|
|
3
|
| Sniper |  |
|
1
| |
| Sniper II |  |
|
3
| |
| Heavy |   |
|
2
| |
| Heavy II |   |
|
|
5
|
Scout[ | ]
Scout is suitable for capturing flags and tagging enemies as the class specializes in speed and agility. Scout's loadout makes them vulnerable at middle range, often forcing them to choose between narrowing the distance to use close-range firearms like their ![]() SMG or fleeing to use their
SMG or fleeing to use their ![]() Bow & Sparrow from a safe range.
Bow & Sparrow from a safe range. ![]() Skunk Bombs allow scouts to prevent flag captures and provide cover to teammates.
Skunk Bombs allow scouts to prevent flag captures and provide cover to teammates.
Medic[ | ]
Medic is primarily a support class that can heal teammates with the ![]() Dogna's Dart Gun and
Dogna's Dart Gun and ![]() Dogna's Dartfly Gun, but it can also be used offensively to deal poison damage to enemies, allowing the rest of your team to finish them off. The
Dogna's Dartfly Gun, but it can also be used offensively to deal poison damage to enemies, allowing the rest of your team to finish them off. The ![]() Cupgrade enables medics to heal quicker, shortening the time they need to spend outside the battlefield.
Cupgrade enables medics to heal quicker, shortening the time they need to spend outside the battlefield. ![]() Bananas are helpful to protect the flag from being captured or slipping enemies to finish them off with the
Bananas are helpful to protect the flag from being captured or slipping enemies to finish them off with the ![]() Dual Pistols or
Dual Pistols or ![]() SMG. It's advised not to throw banana peels where teammates are more likely to slip on them than enemies.
SMG. It's advised not to throw banana peels where teammates are more likely to slip on them than enemies.
Assault[ | ]
Assault focuses on using the ![]() AK and
AK and ![]() M16 to kill enemy animals. Assault II also provides
M16 to kill enemy animals. Assault II also provides ![]() Grenades, which can help clear out enemies in enclosed areas. Animals using the Assault class are most powerful working together as a team. When supported by animals using other classes, they can provide a barrage of firepower that prevents enemies from approaching.
Grenades, which can help clear out enemies in enclosed areas. Animals using the Assault class are most powerful working together as a team. When supported by animals using other classes, they can provide a barrage of firepower that prevents enemies from approaching.
Sniper[ | ]
Sniper allows players to provide firing support from afar with the ![]() Hunting Rifle or
Hunting Rifle or ![]() Sniper. It is useful for holding down long corridors and sniping animals with broken armor in large firefights. Weakened animals can also be finished off with the
Sniper. It is useful for holding down long corridors and sniping animals with broken armor in large firefights. Weakened animals can also be finished off with the ![]() Dual Pistols. With the
Dual Pistols. With the ![]() Lucky Cat Mine, traps can be laid for unaware animals, who can then be finished off.
Lucky Cat Mine, traps can be laid for unaware animals, who can then be finished off.
Heavy[ | ]
Heavy is a class that prioritises high-damage weapons. Equipped with ![]() Shotguns and
Shotguns and ![]() Magnum, they can kill their enemy faster than the other classes, but risk getting killed early. Using their
Magnum, they can kill their enemy faster than the other classes, but risk getting killed early. Using their ![]() Big Clucking Gun and
Big Clucking Gun and ![]() Grenades, they can deal area-of-effect damage to defend their flags from being captured or trapping the enemy who are in groups.
Grenades, they can deal area-of-effect damage to defend their flags from being captured or trapping the enemy who are in groups.
Points[ | ]
Each team starts with a total of 999 Reinforcement Points (RP). When a team has reached 0 RP, they will have lost the game, and the opposing team will have won. After a 30 second grace period, teams will begin losing points. There is a passive loss of 0.25 RP per second. More RP is lost per second when the opposing team is holding flags. This effect becomes larger as the opposing team captures more flags. This means that capturing flags is important to reduce the rate of point loss by one's own team, and holding all the flags will cause a more drastic shift as the opposing team loses points faster.
If there is an actual tie at the end of the game where both teams have exactly 0 points, the winner will be decided by a coin toss.
| Source | Points lost |
|---|---|
| Passive loss | 0.25 RP/s |
| 1 flag held by opposing team | 0.5 RP/s |
| 2 flags held by opposing team | 1.5 RP/s |
| 3 flags held by opposing team | 2.75 RP/s |
| Player respawned | 1.5 RP |
| Flag captured by opposing team | 10 RP |
| Opposing team activated Giant Star-nosed Mole reward crate | 100 RP |
Flags[ | ]

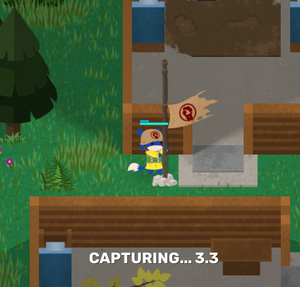
 Supersonic Fox capturing a Flag.
Flags are the main objective of this mode, and are neutral at the start of a round. Flags take 5 seconds to capture. The team that currently owns a flag will receive 4 Health Points per second in a small zone which is visible as a green circle around the flag. Capturing a flag from the opposing team deducts 10 points from the team who lost the flag. The player who captured the flag will gain 1 tick towards upgrading their kit. When captured, flags drop a random set of ammunition. If a flag is re-captured within 20 seconds, it will not drop any loot.
Flags can only be captured by one Super Animal at a time. The flag will stop being captured if the animal capturing it moves away from the flag.
Giant Star-nosed Mole[ | ]
- See also: Non Player Character (NPC) § Twinkle
 Super Weimaraner activating the Giant Mole Crate.
The Giant Star-nosed Mole appears 25 seconds after an announcement when a team has reached 450 points. The mole will defend itself by throwing crates and slamming the ground to attack players who approach too close. The crates the Mole throws have a chance of dropping ammo. The amount of health points the Giant Star-nosed Mole has depends on the number of non-bot players in the game, linearly scaling from a base of 5500 HP at 15 non-bot players and below to 14000 when there are no bot players. At half health, the mole will return underground. When it re-emerges, it will throw crates 40% faster than before.
When the Giant Star-nosed Mole is defeated, the team of the player who landed the last hit will receive a 20% speed boost for 1 minute. The mole will leave behind a special reward crate which can be opened similarly to capturing a flag. Opening the crate will deduct 100 points from the opposing team. Opened crates display an image of a team to which the animal who opened the crate belongs to.
The Giant Star-nosed Mole is a excellent opportunity for teams to come back when they have less points. By securing the crate, they can deduct 100 points from the other team, which can turn the tide of the battle. The speed boost is also useful and can allow a team to secure more flags or kills.
Maps[ | ]
There are currently 8 maps implemented. Each map is centered around a Super Animal World landmark. Each map has a spawn point for S.A.W. and Rebellion forces alike and 3 flags for each side to gain control of in the middle; one on each side, and one directly on the map's dividing line. S.A.W. forces always start on the right side, while the Rebel forces always start on the left.


- Another Dam Standoff: Set at the Beaver Construction HQ. The A flag is outside the workshop on the left, the B flag is inside the Head Beaver's house, and C is located between two S.A.W. Villas houses. The Giant Mole spawns north of the Head Beaver's house, on the small land bridge. B is enclosed, so
 Grenades and Skunk Bombs can prove useful to clear any enemies out. The road in the lower part of the map provides an opportunity for each team to capture the further flags behind the other team's back.
 - Rumble in the Tundra: Set in and around the Super Penguin Palace. The A flag is in a grove of trees just outside Superite Mountain, the B flag is near the south entrance of Club Le Waddle, and the C flag is north of the S.A.W. Research Labs. The Giant Mole spawns at the centre of the map, near the south entrance of the palace. The ice around the B flag can pose difficulty attacking that flag. Large battles often occur near the southern entrance to the palace, where the paths of both teams meet.
- Operation Lab Labs: Set mainly in the S.A.W. Research Labs. The A flag is north of Building 1 of the Labs, the B flag is outside the main entrance of the Labs, and the C flag is north of Building 3. The Giant Mole spawns in the centre of the map between the two small buildings.
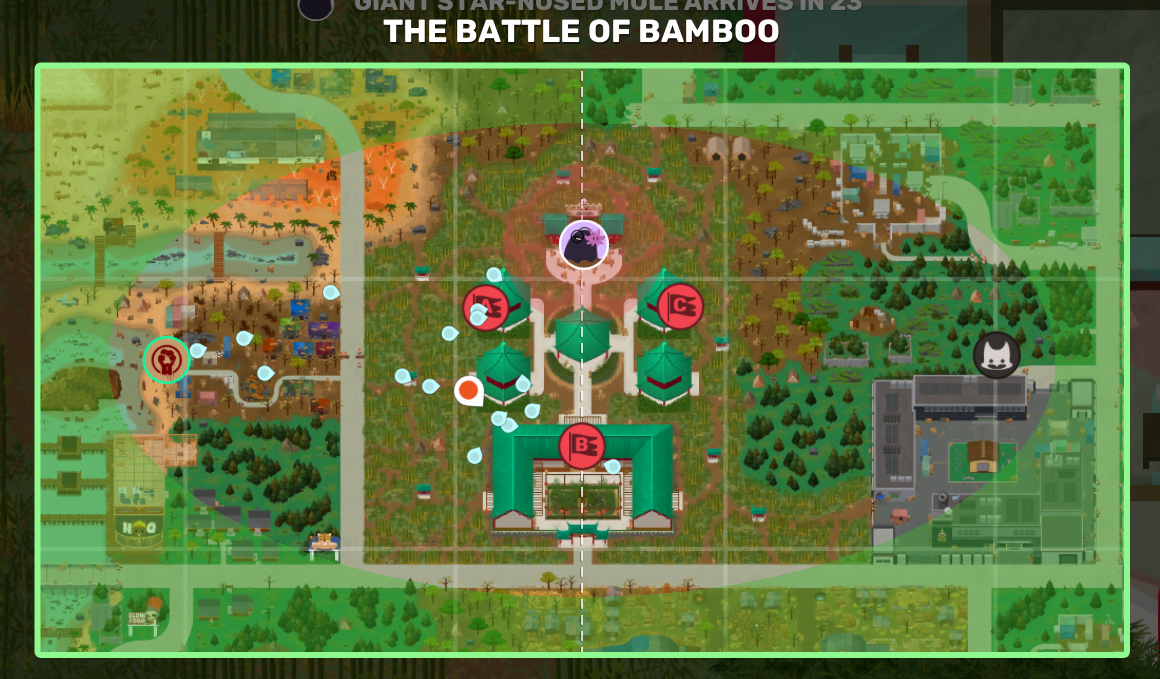
- The Battle of Bamboo: Set in the S.A.W. Bamboo Resort. The A and C flags are in the pavilions on either side of the Bamboo Stage, while the B flag is set inside the southern building. The Giant Mole spawns at the Bamboo Stage. The B flag is slightly shielded from sight by a panel and can be stealthily captured.
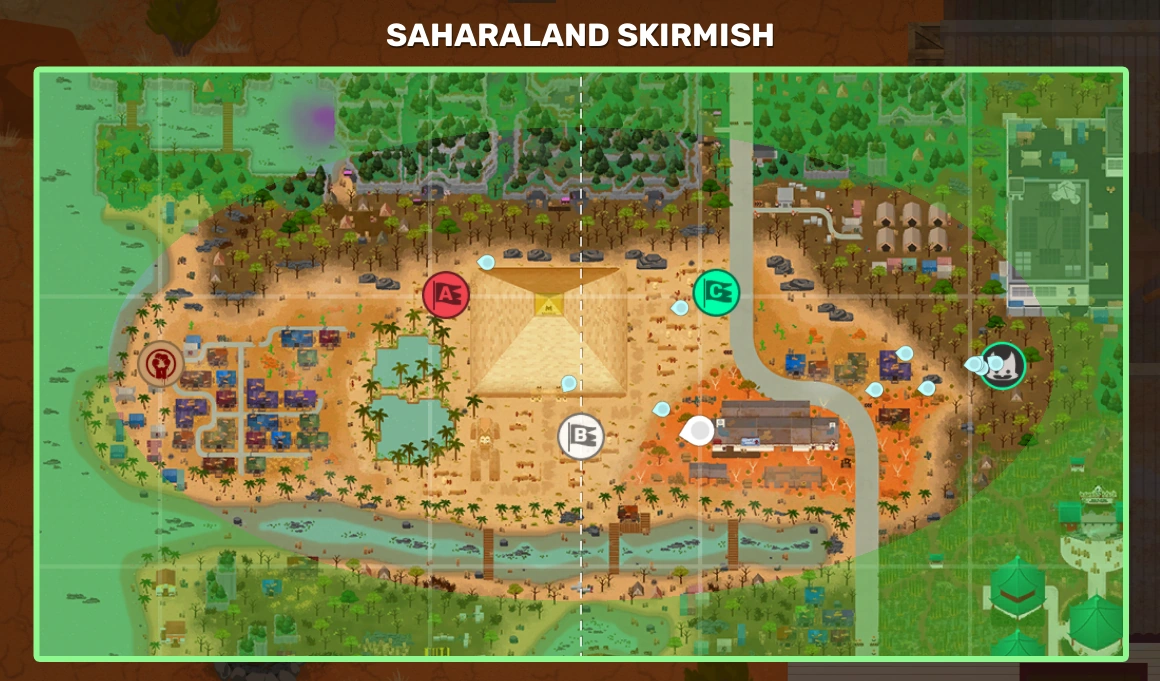
- Saharaland Skirmish: Set in and around the Super Pyramid. The A flag is outside the western entrance to the pyramid, the B flag is in one of the ruins near the south end of the pyramid, and the C flag is set near the road leading north from the Giant Emu Ranch. The Giant Mole spawns south of Superite Mountain, north of the pyramid. B is located behind many walls, which makes it hotly contested and hard to attack. Players using the Heavy class can get many shotgun kills from enemies trying to approach B through the narrow entrances. Grenades and Skunk Bombs can be thrown over the walls to surprise and scatter any defenders inside. Heavy fighting takes place near the southern end of the pyramid, leading to dynamic gameplay, which can lead to large wins for either side.
- The Fight for Superite: Set in and around Superite Mountain. The A flag is outside the cave entrance to the west, the B flag is between the two mountains, and C is at the northeastern entrance to the mountain. The Giant Mole spawns north of Superite Mountain, in the tundra. This map has many chokepoints for both teams, and heavy fighting occurs at the cavern's exits, especially surrounding B.
- Farmageddon: Set in Super Animal Farm. A is set north of the Catch A Super Pig attraction, B is set to the south end of the barn, and C is set in a field to the east. The Giant Mole spawns on the road between the farm and the Bamboo Resort. Heavy fighting takes place in the corridor leading to B. Extremely heavy gunfire and usage of Skunk Bombs here slows both teams' advancement towards the flag, and teams must work together to reach and capture it. Stealthier players may use the northern corridor to capture flags behind the other team's back.
- Security Situation: Set in the S.A.W. Security HQ. A is in a bamboo grove outside the eastern wall of the Security HQ, B is set inside the security HQ north of the armory, and C is set in the corridor between the Security HQ and Pixile Port. The Giant Mole spawns south of the H.Q., close to the main entrance in the southern wall. Heavy fighting takes place at B, as the rebels can approach both from the bottom and through the barracks. To the south, a road leads directly from A to C, which both teams can use to capture the other flag.
Top Players[ | ]
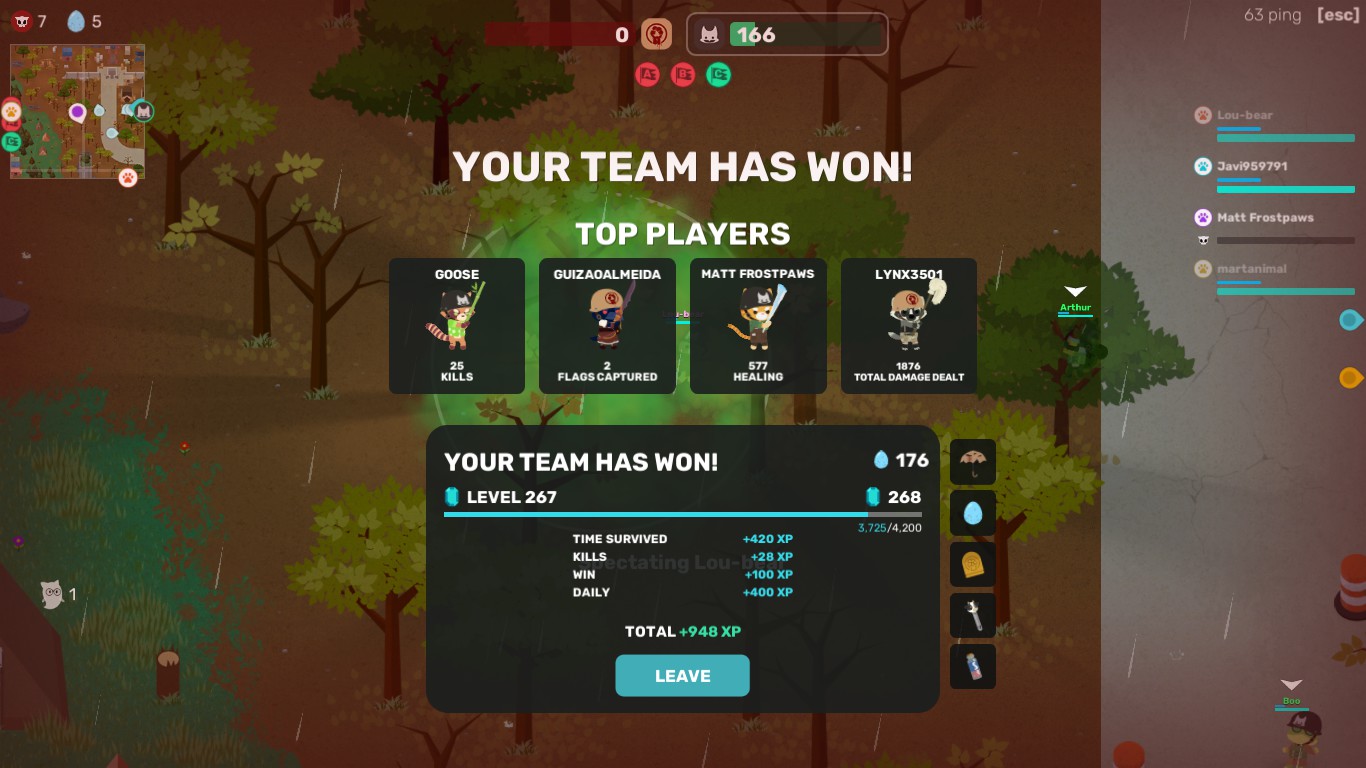
At the end of the match, up to four top players are selected and displayed for accomplishing outstanding feats in milestones such as:
- Kills: The total number of Super Animals killed during the match.
- Total Damage Dealt: The total damage dealt in a game.
- Healing: The total amount of healing given to teammates as a Medic.
- Flags Captured: Total number of flags captured.
- Grenade Kills: Total Super Animals killed using Grenades, Skunk Bombs or Lucky Cat Mine.
- Hamster Ball Kills: Total Super Animals killed using Hamster Balls.
- Emu Kills: Total enemy Super Animals killed using Giant Emus.
- Banana Slips: Total number of Super Animals slipped using the Banana.
- Melee Kills: Amount of Super Animals killed using the Melee Weapon.
- Vanquished Giant Mole: Be the Super Animal who defeated the Star-Nosed Giant Mole.
Trivia[ | ]
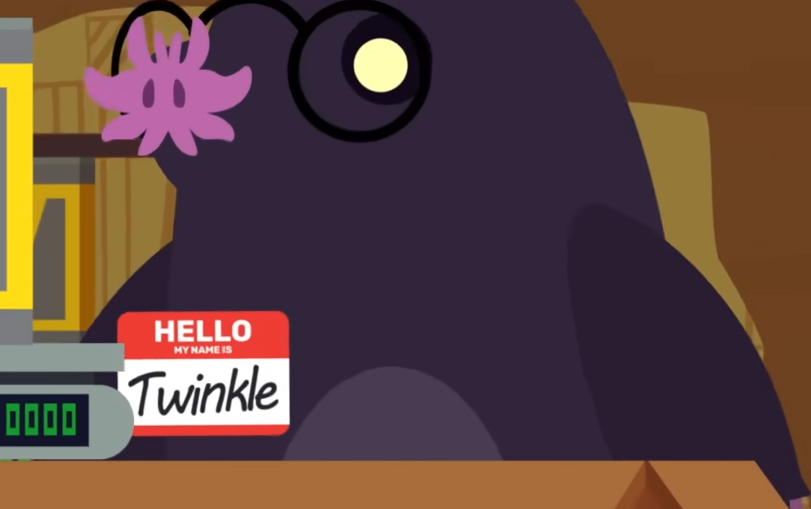

Twinkle's nametag in Super Animal Royale Tonight, Season 2, Episode 6
- On the round start screen for the Rebels, there is a fly sitting in the bottom left corner that can be squished when clicked on. According to the official Super Animal Royale Twitter, the fly is called Squishy.
- According to Super Animal Royale Tonight, Season 2, Episode 6, the Giant Star-nosed Mole is named Twinkle; this may be a reference to the popular nursery rhyme "Twinkle Twinkle Little Star" because of the mole's star-shaped nose.
- Dr. Dogna and her Rebellion Lab Lab counterpart, Dr. Spotson, can be seen peeking out of the spawn point hatches occasionally.
- The speed boost from defeating the Giant Star-nosed Mole also applies to emus and hamster balls.
- Capturing the Giant Mole Crate when the enemy's Reinforcement Point is under 100 will instantly win the match.
- Compared to the original SvR, this version of the gamemode has 8 less players per side (24 down from 32) and smaller maps.
- Lucky Cat Mines thrown near the team's spawn point will not explode and will disappear shortly after arming.
- Damage to the Mole, Emus and Self damage with grenades / Cat mines / Skunk Shrooms count towards the "Top Players" damage
Gallery[ | ]
Original promotional artwork
Interface and enemy/friendly appearance
Healing circle around the flag
Top player awards at the end of a match
Round start screen for the Rebellion
Ditto, but with the fly in the bottom left corner squished and killed
Round start screen for S.A.W. Forces


Patch History[ | ]
- A soft matchmaking system has been implemented in the SAW vs Rebellion game mode. At the start of a match, teams are balanced based on player level for an improved and more balanced experience. This means you won’t get your helmet until the match begins and your team is assigned.
- Amount of carried Skunk Bombs has been reduced from 2 to 1 for Scout I, and from 4 to 3 for Scout II.
- Teammates no longer cause Lucky Cat Mines to set off when walking through their trigger area.
- Quick chat pings will now display in-world for your extended team in SvR or the Bwoking Dead game modes (previously, they were visible only on the map and minimap).
- Heavy I in SvR now has a rare magnum in place of the uncommon magnum.
- Some bots will travel to the Giant Star-nosed Mole in SvR to fight it.
- The Giant Star-nosed Mole’s HP now scales from 5,500 to 14,000 depending on player count (linear between 15 and 48 real players). Previously, it was scaling between 6,900 to 10,000 health, which was a bit high for less populated matches, and a bit low for full matches.
- Since the Giant Mole has more health in most cases, it will start arriving at 450 Reinforcement Points rather than 400.
- Ammo drops from killed players now give 3x as much, to help alleviate some of the ammo issues that players faced.
- Assault gets a rare pistol now.
- Sniper II has been changed from having 1 Skunk Bomb to 2 Lucky Cat Mines.
- Heavy II now gets the SAW Impossible Tape powerup.
- Marking or pinging the map on a flag will now ping as Defend or Capture based on context rather than the standard paw marker.
- Lowered respawn time for Giant Emu and Hamster Ball in SvR from 30s to 20s.
- Removed a rock above Beaver HQ that made the Giant Mole boss area imbalanced.
- Fixed the previous weapon hotkey (T) not working with respawn.
- Bots no longer pickup ammo, Super Tape, or health juice.
- Super Tape and health juice now despawn after 30s and repeated flag captures within 20s no longer drop items.
- Bots no longer ditch a flag capture to fight someone or to flee from damage if the flag is within 1.5 seconds of capture.
- Class counters have been added displaying current amount of animals using given class.
- Tier 2 of Medic class has been changed – Dogna's Dart Gun has been replaced with new Dogna's Dartfly Gun and Thomas Gun has been changed to SMG.
- Added Giant Star-nosed Mole as a game mechanic. It appears when one of the team reaches 400 Reinforcement Points.
- Time required to capture the flag has been reduced from 8 to 5 seconds.
- Capturing the flag deducts 10 points from team that lost the flag.
- Changed Reinforcement Points deductions:
- Based on amount of flags captured (1 captured flag drains the enemy at 0.5RP per second, 2 captured flags drain 1.5RP per second, and 3 captured flags drain 2.75RP per second)
- Based on respawning (now drains 1.5RP instead of 2RP)
- Passive point drain changed from 0.667RP/s to 0.25RP/s
- When Hamster Ball is broken, after a while it will respawn near the team bases.
- Giant Emus will respawn at their original spawn location about 30 seconds after dying with no players nearby. Their spawn chance has also been slightly increased in SvR.
- Medic II's armor has been reduced from T3 Armor to T2 Armor, amount of Bananas from 10 to 5, and increased amount of initial Super Tape from 4 to 5.
- If player changed weapon order for given class, it will be remembered from now on.
- The positions of flags A and C in the Security Situation map have been changed.
- Healing buff from near the spawn hatches has been completely removed.
- Changed how points are being displayed and evaluated as win condition. In the past they were rounded down to 0, this has been changed to round scores up to 1. This makes it less probable to create a tie. If however, in a rare chance a tie occurs, the victor will be picked at random.
- Flag positions have been adjusted on the following maps: Battle of Bamboo, Operation Lab Labs, and Saharaland Skirmish. Circle of Life on Saharaland Skirmish was moved a bit to the north.
- Sniper I class now has a Hunting Rifle (instead of Uncommon).
- Sniper II class now has a Sniper (instead of Rare).
- The Sniper recoil in this mode has been reduced.
- In order to rank up as a Medic, you must now heal 75 HP to gain a tick towards Medic II (up from 50 HP).
- The names of players featured in the Top Players section after a match are highlighted in green.
- The sound effect for respawning has been updated to be as explosive as its animation.
- Massive overhaul to gameplay implemented (legacy mode described in S.A.W. vs Rebellion/Legacy).
- Classes added.
- 8 preset battle maps added with no more gas build up.
- Allied players can no longer be knocked down and revived.
See also[ | ]
- S.A.W. vs Rebellion/Legacy for information about this game mode before v1.4
References[ | ]
- ↑ Blog Post by Michael Silverwood posted in March 25th 2022
- ↑ "Season 3 kicks off next Tuesday, April 5th, with a revamped version of the S.A.W. vs. Rebellion control point mode: now with respawns, class selection and more! 🚩" – Tweet from @AnimalRoyale Posted in Mar 28th 2022 at 5:00 PM UTC
- ↑ Blog Post by Michael Silverwood posted in September 25th 2020
- ↑ Clogg on Discord: https://discord.com/channels/413200888010637313/413200888010637317/990670929736634418 "gogo, help, danger, and pinging flag all transmit to full 24 person team, however if the person is not in your squad it wont show a chat message (to avoid spam) and only show on the map" Note that this changed in v1.8 so a ping sends a chat message to everyone on the team as well.
- ↑ https://store.steampowered.com/news/app/843380/view/3726222076183618157
Animal Royale |
|
|---|---|
Limited Time Modes |
|
Zaw djxd